
Mastering the Battleplan Chain of Command: A Guide to WW2 Strategy Success
Learn how to optimize your Battleplan chain of command to dominate the battlefield. Discover unit management, logistics, and tactical tips in this comprehensive guide.
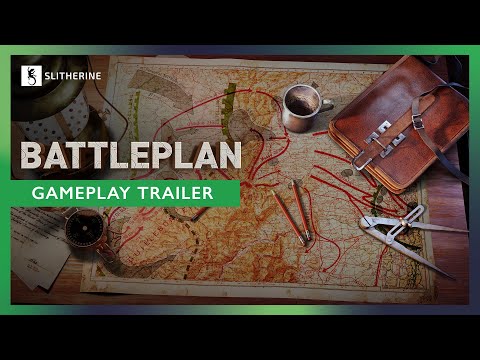 Official mediaLearn how to optimize your Battleplan chain of command to dominate the battlefield. Discover unit management, logistics, and tactical tips in this comprehensive guide.YouTube
 Strategy games often boil down to unit stats and reaction times, but Battleplan demands something much deeper: foresight. Mastering the Battleplan chain of command is the difference between a decisive victory and a stalled, costly offensive. By effectively organizing your Battleplan chain of command, you ensure that your divisions operate as a cohesive, lethal force rather than a disorganized mob of individual units.
Whether you are a newcomer to the genre or a veteran of grand strategy simulations, understanding the relationship between your headquarters, your officers, and the units on the ground is the key to winning the war. In this guide, we will break down the mechanics of the game, helping you move from basic drills to advanced, multi-stage maneuvers.
Understanding Your Command Structure
In Battleplan, your army is not just a collection of sprites; it is a complex, hierarchical machine. The Battleplan chain of command is built around the concept of divisions, which are composed of various fighting elements including infantry, artillery, engineers, and scouts. Each of these units plays a specific role, and when they are organized correctly, they provide unique combined arms bonuses to one another.
When you begin a mission, you are not just a general; you are a logistics manager and a tactician. The game interface provides a wealth of information at the bottom of the screen, where your divisions are displayed. Understanding these stats is vital. For example, infantry units are your backbone—they are excellent at holding ground and digging in, but they are notoriously poor on the offense without proper support.
Unit Specialization and Roles
To optimize your army, you must understand what each unit type brings to the table. Relying on a single unit type is a recipe for disaster. The following table summarizes the primary roles of the core units you will manage:
| Unit Type | Primary Role | Best Usage |
|---|---|---|
| Infantry | Holding ground/Defense | Defending supply corridors and front lines. |
| Artillery | Fire support | Softening fortified enemies before an attack. |
| Engineers | Utility/Fortification | Laying minefields and clearing enemy obstacles. |
| Scouts | Reconnaissance | Revealing enemy positions and tagging targets. |
| Anti-Tank | Vehicle suppression | Hunting enemy armor and supporting infantry. |
| Headquarters | Logistics/Command | Stat bonuses for nearby units (must be protected). |
Customizing Your Order of Battle
The "Army Constructor" is perhaps the most critical tool for any aspiring commander. This is where you manipulate the Battleplan chain of command to suit your specific mission objectives. You can add units to formations to increase their strength, but more importantly, you can assign officers to lead these divisions.
Each officer brings unique traits to the field. A "reliable" officer, for example, might offer a defensive buff that increases damage and defense at the cost of movement speed. As your officers survive engagements, they gain veterancy and new abilities, making them more valuable over time. If you lose a headquarters unit, you risk losing the officer entirely, which can temporarily paralyze the entire division.
Managing Your Divisions
You have the flexibility to merge units into corps to make command easier or to split them down to the company level for surgical strikes. Customizing your hierarchy is not just about aesthetics; it is about efficiency.
- Merging: Click and drag a secondary unit onto an existing division. This creates a larger, more powerful force that is easier to manage as a single entity.
- Splitting: Use the split button to break off units. This is essential when you need to capture multiple objectives simultaneously or when you need to send specialized units (like engineers) on a flanking maneuver.
- Chain of Command: You can click and drag lines between units to manually define which units report to which headquarters. Disconnecting a unit allows you to create a separate, independent formation.
Logistics: The Lifeblood of Your Army
A well-organized Battleplan chain of command means nothing if your soldiers are hungry and out of ammunition. Logistics in Battleplan is realistically simulated. Terrain dictates supply flow, and if your supply lines get too long, your efficiency will plummet.
When you move your units away from a supply depot, you will notice the supply indicators turning from green to red. Green indicates that the unit is receiving adequate supplies, while red warns that the unit is consuming more than it is receiving. If this continues, your units will suffer attrition and eventually surrender in combat.
Managing Supply Depots
To keep your offensive momentum, you must proactively manage your supply lines. Place new supply depots near your front lines as you advance.
| Supply Status | Indicator | Action Required |
|---|---|---|
| Optimal | Green Numbers | Maintain current advance pace. |
| Deficit | Red Numbers | Halt advance, establish new supply depot. |
| Critical | Zero Supply | Immediate retreat or resupply operation. |
"Player experience" reports suggest that one of the most common mistakes beginners make is overextending. They push deep into enemy territory, capture a town, and then wonder why their troops are suddenly losing morale and combat effectiveness. The solution is simple: always build your logistics network as you advance, not after you have already run out of supplies.
Executing Advanced Battlefield Maneuvers
The hallmark of the game is the ability to draw plans directly on the map. This is where the Battleplan chain of command truly shines. You are not manually clicking every single soldier; you are issuing high-level orders that your officers interpret and execute.
When you create a plan, you can designate zones and assign specific tactics to them. For example, you can set a "Seize Ground" order for your infantry while simultaneously setting an "Artillery Barrage" order for your supporting batteries.
Tactical Order Overview
| Order Type | Best For | Caution |
|---|---|---|
| Seize Ground | Taking territory | Can lead to units clumping up; use with caution. |
| Breakthrough | Punching through lines | High risk; requires heavy artillery support. |
| Encircle | Starving the enemy | Requires careful coordination of multiple flanks. |
| Balanced Hold | Defensive stability | Best for preserving morale and unit strength. |
When executing these orders, remember that your units move at realistic speeds. Infantry takes time to walk to their destination. If you order them to attack without scouting, they will walk blindly into fortified positions. Use your scouts to tag enemies, and use your engineers to clear minefields before you launch your main assault.
Field Lessons and Pro Tips
If you are struggling to make progress, it is usually because you are trying to force a "head-on" attack against a fortified position. As the Battleplan Steam page highlights, this is a simulation, not an arcade game. You cannot simply overpower the enemy with raw numbers if they are dug in.
Strategies for Success
- Don't Fear the Retreat: If an attack is failing, do not be afraid to pull back. You can click the retreat flag to preserve your units' morale. A retreated unit can recover; a destroyed unit is gone forever.
- Use the Emergency Meeting: If your initial plan is going south, the game allows for an emergency meeting to issue new orders. Use this to pivot your strategy when the "fog of war" reveals that the enemy is stronger than anticipated.
- Avoid Clumping: When you draw your attack zones, try not to draw one massive zone for all your units. They will bunch up and move as a single, inefficient mass. Split your force into smaller, overlapping zones to create a wider front.
- Target the Enemy HQ: The game explicitly rewards destroying enemy command structures. If you can identify the enemy headquarters, focus your artillery and mobile units on that specific target. It can cause the entire enemy line to collapse.
Frequently Asked Questions
How do I change the chain of command in Battleplan?
You can customize your hierarchy in the army constructor or on the main map screen. Click and drag the lines connecting your units to detach or reattach them to different headquarters. This allows you to create independent formations that can operate on different objectives.
Why is my unit's morale dropping so fast?
Morale drops when units take casualties, run out of supplies, or are cut off from friendly territory. If your units are surrounded, they will lose morale rapidly. Ensure your Battleplan chain of command includes adequate logistics to keep your troops supplied and connected to the rear.
What is the best way to handle fortified enemies?
Do not attack them head-on. Use your scouts to find their positions, use artillery to soften their fortifications, and use engineers to clear minefields. If possible, use an "Encircle" order to cut off their supply lines, which will force them to surrender without a direct assault.
Does the Battleplan chain of command affect unit bonuses?
Yes. Headquarters units provide passive stat bonuses to all units under their command. If a headquarters takes damage or is destroyed, the officer in charge can be killed or wounded, which removes these bonuses and can temporarily paralyze the units that were relying on that command structure.
Final Thoughts
Mastering the mechanics of Battleplan takes time, patience, and a willingness to learn from your failures. By focusing on your logistics, carefully managing your officers, and using the map-drawing tools to create nuanced, multi-stage plans, you will find that the game rewards strategic thinking far more than fast clicking.
Remember, every unit is a resource. Keep them supplied, keep them organized, and keep them under the command of capable officers. Your Battleplan chain of command is the foundation upon which your victory will be built. Now, get back to the map and prepare your next offensive—the mission is waiting.
Related guides
Mastering Battleplan Combined Arms: The Ultimate Strategy Guide for Army Dominance
Learn how to dominate the battlefield in Battleplan by mastering combined arms tactics, unit synergies, and effective army composition strategies.
Mastering Battleplan Division Management for Ultimate Tactical Victory
Learn essential battleplan division management strategies, supply logistics, and tactical order planning to dominate WWII RTS warfare.
Mastering Battleplan Officer Skills: Strategies for Ultimate RTS Victory
Learn how to optimize Battleplan officer skills, command corps efficiently, and master supply lines to win complex World War II real-time strategy battles.
Mastering Battleplan Units: A Complete Guide to Army Management and Tactics
Learn how to optimize your Battleplan units, manage supply lines, and execute complex maneuvers in this WWII RTS. Master the battlefield today.