
Mastering Battleplan Defense in Depth: A Comprehensive Tactical Guide
Learn how to dominate the battlefield in the new WWII RTS. Master the Battleplan defense in depth strategy, manage your logistics, and command divisions to victory.
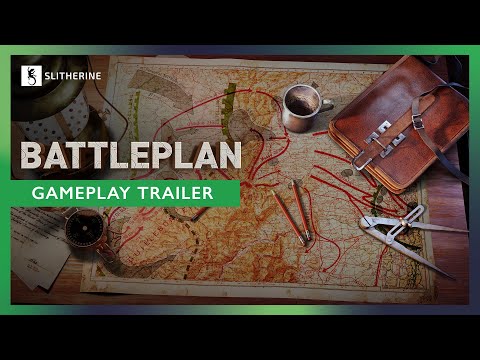 Official mediaLearn how to dominate the battlefield in the new WWII RTS. Master the Battleplan defense in depth strategy, manage your logistics, and command divisions to victory.YouTube
 The release of the latest World War II real-time strategy title has captured the attention of history buffs and wargamers alike. If you are looking to master the intricacies of this new title, understanding the nuances of a Battleplan defense in depth is essential for long-term success. While the game offers deep simulation and historical accuracy, achieving victory requires more than just raw firepower; it demands a strategic Battleplan defense in depth to protect your supply lines, manage your officers, and effectively neutralize enemy momentum across massive, historically accurate battlefields.
In this guide, we will break down how to transition from a novice commander to a master strategist. We will explore the mechanics behind planning, the importance of logistics, and how to utilize specific orders to control the flow of battle.
Choosing Your Planning Environment
Before you dive into the campaign, you must decide how you want to interact with the game's tactical layer. As noted by community reports, the game offers two distinct modes for handling orders: the rigid Planning Phase and the more flexible Readiness Mode.
For those new to the genre, Readiness Mode is generally the recommended starting point. It allows for a more forgiving gameplay loop where you can adjust your strategy throughout the day, though it requires patience as you wait for your orders to reach 100% readiness to avoid efficiency penalties.
| Feature | Planning Phase Mode | Readiness Mode |
|---|---|---|
| Flexibility | Low (One phase per day) | High (Create plans anytime) |
| Difficulty | High | Intermediate |
| Penalty Risk | Low (If planned correctly) | High (If executed before 100%) |
| Best For | Experienced Tacticians | Learners & Casual Play |
The key to success in either mode is understanding that this game is not a twitch-based shooter. It is a simulation that rewards patience, deliberate movement, and the ability to look several steps ahead.
Mastering Battleplan Defense in Depth
A Battleplan defense in depth is not just a buzzword; it is a fundamental pillar of the game’s combat system. Unlike traditional RTS titles where you might simply build a wall of units, this game requires you to utilize defensive orders—such as counterattacks—to pin enemies in place while your armored spearheads prepare for a breakthrough.
When executing a Battleplan defense in depth, you should focus on stretching the enemy's resources. By placing counterattack orders along the front line, you force the enemy to commit their units to conflict. This drains their morale and logistics, creating the perfect opening for your specialized divisions to pierce their center or flank.
Why Defense in Depth Works
- Morale Degradation: Constant engagement under defensive orders lowers enemy unit effectiveness.
- Logistical Strain: Pinning enemies in place prevents them from rotating to meet your true offensive thrust.
- Time Management: It buys you the necessary time to let your artillery and air support soften the target.
Many players find it counterintuitive to use a "Counterattack" order as a defensive measure. However, in the context of the game's AI and simulation, it is the most effective way to keep the enemy occupied while your main force maneuvers.
The Critical Role of Logistics
You can have the finest tanks and the most decorated officers, but your army will grind to a halt without proper supplies. Managing your supply points is perhaps the most critical skill to master. You are limited to four supply hubs, and you will need to constantly deconstruct and relocate them as your army pushes deeper into enemy territory.
Community guides emphasize that you must think of your supply lines as a living, breathing component of your Battleplan defense in depth. If your armored spearhead advances too quickly, they will outpace their supplies, leading to a collapse in combat effectiveness.
Supply Management Best Practices
| Action | Impact | Pro-Tip |
|---|---|---|
| Hub Placement | Dictates range | Place hubs near your armored breakthrough points. |
| Deconstruction | Frees up slots | Always deconstruct old hubs before moving forward. |
| Rebasing | Restores air units | Don't forget to rebase air squadrons after moving supplies. |
| Monitoring | Prevents stalling | Use the supply overlay constantly to check flow. |
Remember that deconstructing and constructing supply points takes time. Do not wait until your units are flashing yellow or red to move your logistics. Anticipate the movement of your front line and shift your hubs accordingly.
Advanced Command and Control Strategies
The game’s officer system adds a layer of RPG-like depth to your military command. You can hire, fire, and promote officers, each with their own traits that influence how your divisions perform.
When setting up your army, you have the option to use historical units or customize your own. While customization is deep—allowing you to tweak individual unit patches and names—new players should consider using the "Historical Units" option for their first few missions to learn the game's flow without getting bogged down in administrative tasks.
Understanding Unit Orders
The game utilizes a color-coded system to help you manage your forces on the map. Understanding these colors is vital for maintaining a clean Battleplan defense in depth during complex operations.
| Order Color | Order Category | Strategic Use |
|---|---|---|
| Blue | Defensive | Holding lines, counterattacking, pinning enemies. |
| Red | Offensive | Breakthroughs, seizing ground, encircling. |
| Gray | Specialist | Scouting, artillery barrages, mining. |
If two divisions are operating in the same sector, the color-coding helps you distinguish between their specific orders. If you find yourself confused, you can manually adjust the borders of your drawn zones using the right mouse button to ensure your divisions aren't stepping on each other's toes.
Execution and Tactical Tips
Once your plans are drawn and your logistics are set, the battle begins. The game allows you to pause, play, or fast-forward, which is essential for managing the timing of your operations.
Scouting and Intelligence
Never attack blind. Air reconnaissance is not just about seeing the enemy; it is about marking them. A marked unit suffers from reduced morale and defenses, and your artillery becomes significantly more accurate. Scouting also reveals enemy supply points, which should be your primary targets for capture. If you cut off the enemy from their supplies, their Battleplan defense in depth will fail, and they will likely surrender.
The Art of the Breakthrough
When it is time to attack, use a combined arms approach.
- Soften: Use artillery barrages to reduce enemy fortification levels.
- Pin: Use infantry on "Seize Ground" or "Counterattack" orders to hold the center.
- Break: Send your armored divisions through a specific, narrow point in the line.
- Mop Up: Use following infantry units to secure the breakthrough path.
For more details on how to optimize your setup, you can visit the official Battleplan game page to review technical specifications and community discussions.
Finalizing Your Offensive
As you reach the final stages of a mission, you will likely be tasked with capturing a major objective, such as a city. This is the moment where all your preparation—logistics management, officer veterancy, and careful planning—comes together.
Do not be afraid to wait for reinforcements. If your current divisions are strained from a long campaign, the arrival of a fresh tank division can be the difference between a stalled assault and a decisive victory. Even if the game gives you a ticking clock, you usually have enough time to ensure your artillery and air support are in position before committing to the final push.
Frequently Asked Questions
What is the best way to execute a Battleplan defense in depth?
To effectively use this strategy, prioritize defensive orders like "Counterattack" on your infantry divisions to pin the enemy. While they are occupied and draining their supplies, use your mobile armored units to perform a "Breakthrough" on a weak point. This forces the enemy to react to your offensive while their own lines are compromised.
How do I stop my units from running out of supplies?
Always keep an eye on the supply overlay. If your units are moving deep into enemy territory, you must deconstruct your rear-most supply hubs and rebuild them closer to the front. Remember that this takes time, so plan your logistical moves before your combat units actually reach the end of their supply range.
Are there penalties for executing plans too early?
Yes. If you are playing in Readiness Mode, executing a plan before it reaches 100% readiness will result in penalties. It is almost always better to wait for the planning bar to fill up completely to ensure your units perform at their peak efficiency.
How do I make the UI easier to read?
If you are struggling to identify unit types, go into the settings and ensure the "3D icons" option is turned on. This provides a visual representation of your units, making it much easier to manage your formations at a glance compared to relying on abstract icons alone.
Mastering this game is a journey of learning how to balance high-level command with the gritty reality of supply lines and unit morale. By focusing on a solid Battleplan defense in depth and keeping your logistical support fluid, you will be well on your way to becoming a formidable commander on the digital battlefield. Good luck, and happy gaming!
Related guides
Battleplan How to Draw Attack Plans: Master WWII RTS Strategy & Tactics
Learn battleplan how to draw attack plans in deep tactical RTS games. Master supply lines, offensive vectors, and military orders like a pro.
Mastering Battleplan Zone Orders: The Ultimate WWII RTS Command Guide
Learn how to master Battleplan zone orders, manage supply lines, and execute multi-stage WWII RTS offensives like a seasoned general.
Mastering the Battleplan Complex Attack: Tactical Strategies for Harus
Learn how to execute a winning Battleplan complex attack in Harus. Optimize your unit composition, pathing, and defensive maneuvers to dominate.
Mastering the Battleplan Encirclement Tactic: A Complete WWII RTS Guide
Learn how to execute a successful Battleplan encirclement in Foolish Mortals Games' new WWII RTS. Dominate logistics, map drawing, and strategy today.