
Mastering the Battleplan Campaign: Essential Tactical Strategies for Success
Learn how to dominate the Battleplan campaign with our expert tactical guide, covering unit management, logistics, and advanced planning techniques.
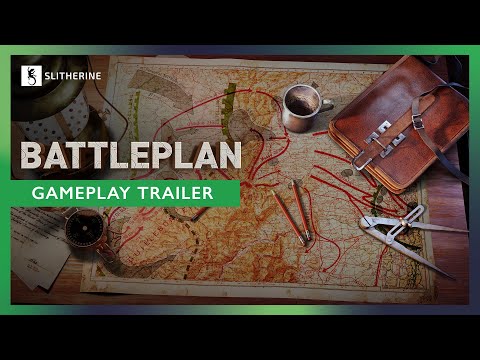 Official mediaLearn how to dominate the Battleplan campaign with our expert tactical guide, covering unit management, logistics, and advanced planning techniques.YouTube
 Understanding the Scope of the Battleplan Campaign
Strategy enthusiasts seeking a deep, immersive World War II experience have found their match in the recently released title from Foolish Mortals Games. The Battleplan campaign offers a level of realism that challenges players to move beyond simple point-and-click tactics, forcing them to think like a true theater commander. Unlike standard RTS games where individual unit micro-management takes center stage, this title emphasizes high-level decision-making, where your primary responsibility is to design intricate, multi-step plans that your officers will then execute autonomously.
Success in the Battleplan campaign requires a fundamental shift in mindset. You are managing massive, month-long engagements where every road, forest, and elevation change impacts your supply lines and troop effectiveness. Whether you are leading a Canadian corps through the Contentan Peninsula or commanding Axis forces in defensive scenarios, the game demands patience, logistical foresight, and a keen eye for terrain.
Core Tactical Principles for Ground Operations
One of the most critical aspects of the game is the planning phase. Players often make the mistake of being too aggressive, pushing units into unfavorable positions without proper support. According to player experience, the most effective way to secure objectives is to utilize the "Complex Defense" and "Hold the Line" orders effectively before moving to offensive maneuvers.
Tactical Order Comparison Table
| Order Type | Best Used For | Risk Level |
|---|---|---|
| Hold the Line | Maintaining front-line integrity | Low |
| Complex Defense | Protecting vital supply hubs | Low/Medium |
| Counterattack | Regaining lost ground | High |
| Pinning Attack | Fixing enemy units in place | Medium |
| Breakthrough | Creating gaps in enemy lines | High |
When you are setting up your initial deployment, prioritize your supply lines. As seen in community reports, failing to account for supply flow can lead to your most elite armored divisions becoming stranded behind enemy lines. Always ensure your units have a clear path to a supply depot, and don't be afraid to pull back and refit if your troop numbers drop below critical thresholds.
Logistics and the Art of Supply Management
Logistics is the heartbeat of any military operation, and the game simulates this with brutal accuracy. You cannot simply surge forward; if you overextend, your units will run out of fuel and ammunition, leaving them vulnerable to counter-attacks.
Supply Flow Impact on Units
| Supply Status | Effect on Combat | Recovery Rate |
|---|---|---|
| Optimal | Full combat efficiency | High |
| Strained | Reduced speed and accuracy | Moderate |
| Critical | Units begin to surrender | Very Low |
| Out of Supply | Total loss of combat effectiveness | None |
To succeed, you must capture and protect supply depots across the map. If you find your lines stretching thin, use your armored divisions as a reserve force rather than leading with them. Let your infantry hold the front while the armor waits for the perfect moment to exploit a breach. You can find more details on these mechanics at the official Slitherine game page.
Leveraging Air Power and Artillery
While infantry and tanks form the backbone of your army, air power and artillery act as the hammer. In the early stages of the Battleplan campaign, you may be tempted to use your tactical air force aggressively. However, note that enemy anti-aircraft fire can quickly chew through your air units if they are deployed without proper escort or against fortified positions.
Effective Support Unit Deployment
- Artillery Barges: Use these to soften up fortified enemy bunkers before a major push.
- Tactical Air Support: Reserve these for high-value targets or to break up enemy concentrations that threaten your flanks.
- Scout Units: Essential for revealing hidden minefields and defensive emplacements before you commit your main force.
Player experience suggests that coordinating your artillery barrage with a "Hold the Line" order is a highly effective way to grind down Axis forces without risking unnecessary casualties among your own infantry.
Building Your Ideal Corps: Customization Tips
The army constructor allows for deep customization, which is vital for adapting to different mission types. Whether you prefer an infantry-heavy force or a fast-moving armored spearhead, your choices during the recruitment phase will dictate your playstyle.
Recommended Unit Compositions
| Force Composition | Strength | Weakness |
|---|---|---|
| Balanced | Versatile in all terrains | Jack of all trades |
| Armored Heavy | High speed, shock value | High supply consumption |
| Infantry Heavy | Excellent in defensive depth | Low mobility |
| Support Focused | Superior artillery/air support | Fragile front line |
Remember that officers also play a significant role. As they gain veterancy, they develop quirks that can change how they interpret your orders. Keep your best officers alive, as their experience is a persistent asset throughout the entire Battleplan campaign.
Advanced Tips for Campaign Longevity
As you progress deeper into the Battleplan campaign, you will face increasingly difficult scenarios. Here are some advanced tips gathered from community reports:
- Don't Rush: The game is a marathon, not a sprint. If a mission lasts a month, you have plenty of time to orchestrate a methodical advance.
- Use Sub-Orders: You can chain commands to create complex, multi-stage attacks. Don't rely on single-order commands; build a plan that accounts for success and failure.
- Monitor Health Bars: Keep a close eye on unit strength. If a unit is down to 50% strength, it is likely more of a liability than an asset. Withdraw it for refitting.
- Terrain Matters: Always place your artillery on high ground. Use the elevation maps provided in the interface to gain a line-of-sight advantage over the enemy.
Frequently Asked Questions
How does the Battleplan campaign handle unit casualties between missions?
Casualties do not always carry over in the same way across all mission types, especially when transitioning from tutorials to main gameplay. However, in the primary campaign, managing your wounded and replacing losses is a key part of long-term success.
Is the Battleplan campaign historically accurate?
While the game uses real-world geographic data, your specific corps composition is up to you. You can choose to play as a Canadian corps in scenarios where historically American units were present, allowing for unique "what-if" gameplay experiences.
What is the best strategy for the Battle of Sherborg?
Based on player experience, avoid aggressive, sweeping maneuvers across the peninsula. Instead, focus on a methodical advance, using artillery to soften enemy pockets and keeping your armored divisions in reserve to exploit breakthroughs in the defensive line.
Can I change my officer's behavior in the Battleplan campaign?
Yes, officers gain veterancy and develop specific quirks over time. You should carefully consider which officers you promote and which you keep in command, as their personal traits will influence their decision-making during the heat of battle.
Related guides
Battleplan Operation Veritable: A Deep Dive into the WWII Rhineland Offensive
Explore the strategy, execution, and historical impact of the Battleplan operation veritable, a critical WWII Allied offensive to clear the Rhineland.
Mastering Battleplan Operation Varsity and Campaign Missions Guide
Discover how to conquer Battleplan Operation Varsity and master the 11 historical missions in this operational World War II wargame strategy guide.
Mastering the Battleplan Battle for Caen: A Comprehensive Strategy Guide
Conquer the Battleplan battle for caen mission with our expert guide. Learn top tactical tips for defensive lines, unit management, and encirclement.
Mastering the Battleplan Operation Cobra: Strategies for Success in Normandy
Struggling to secure a victory in the historic Battleplan Operation Cobra? Get expert tips, unit breakdowns, and tactical advice to dominate the mission.