
Mastering Battleplan Units: A Complete Guide to Army Management and Tactics
Learn how to optimize your Battleplan units, manage supply lines, and execute complex maneuvers in this WWII RTS. Master the battlefield today.
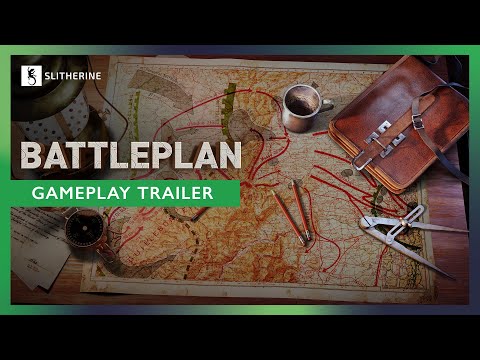 Official mediaLearn how to optimize your Battleplan units, manage supply lines, and execute complex maneuvers in this WWII RTS. Master the battlefield today.YouTube
 The release of the new World War II real-time strategy game has brought a wave of tactical depth that challenges even the most seasoned genre veterans. If you are just diving into this simulation, understanding how to command your Battleplan units is the first step toward achieving victory on the massive, historically accurate battlefields. The game forces you to move beyond simple "click-to-move" tactics, requiring a deep understanding of logistics, officer management, and multi-stage planning. For new players, the effective utilization of Battleplan units is the difference between a swift, decisive breakthrough and a stalled offensive that leaves your forces vulnerable.
In this guide, we will break down the essential components of army management, supply chain logistics, and the tactical nuances required to dominate the map. Whether you are a fan of historical accuracy or just looking to optimize your front lines, this breakdown will help you get the most out of your divisions.
Army Organization and Builder Mechanics
One of the most intimidating yet rewarding aspects of the game is the Army Builder. This feature allows you to customize your forces down to the individual unit level. You can hire officers, assign specific traits, and curate the composition of your regiments. However, for those who want to jump straight into the action, the game provides a "Use Historical units" option, which is highly recommended for your first few missions.
Customizing your Battleplan units offers significant strategic advantages if you know what you are doing. Officers, for example, bring specific traits that can boost combat effectiveness or logistics capacity. As your officers gain experience, they develop quirks and veterancy, making them invaluable assets that you should strive to keep alive throughout the campaign.
| Feature | Custom Army | Historical Units |
|---|---|---|
| Setup Time | High (Deep customization) | Low (Instant access) |
| Officer Traits | Fully configurable | Predetermined |
| Unit Composition | Tailored to your playstyle | Historically accurate |
| Best For | Experienced players | Beginners & Learning |
When you opt to build your own army, remember that the game allows for granular control. You can split divisions into corps or drill down to company-level management. This level of detail is perfect for players who want to simulate specific historical scenarios or experiment with "what-if" army compositions.
Mastering Logistics and Supply Lines
The most common pitfall for new players is neglecting the supply chain. In this game, an army marches on its stomach, and if you fail to manage the supply of your Battleplan units, your offensive will grind to a halt regardless of how powerful your tanks are. Every mission provides a limited number of supply points—usually four—which must be strategically placed to support your advancing forces.
Supply points are not static; you must constantly deconstruct and rebuild them as your frontline moves. Deconstruction and construction take real-time minutes, so you cannot simply react to a supply shortage on the fly. You must plan for your logistics at least one step ahead of your combat maneuvers.
Key Logistics Management Tips:
- Anticipate Movement: Always place supply points in captured villages or key logistics hubs behind your current offensive line.
- Monitor Consumption: Tanks and heavy armor consume supplies at a much higher rate during breakthroughs.
- Rebase Air Units: If you capture new territory, remember to use the "rebase" option for your air squadrons. If you remove the supply point they are attached to without rebasing them, they will run out of fuel and become ineffective.
- Use the Overview: Frequently check the supply overview map mode to ensure your units are within range of a functional hub.
Understanding Tactical Unit Roles
The game categorizes units by their function, and understanding these roles is critical for successful combat. You cannot treat an infantry squad the same way you treat an armored division. The game's mechanics reward players who use combined arms tactics—using one unit to pin the enemy while another maneuvers for the kill.
Breakdown of Unit Roles
| Unit Type | Primary Role | Tactical Usage |
|---|---|---|
| Infantry | Holding ground, clearing mines | Use for "Seize Ground" orders; slow but steady. |
| Tanks | Breakthrough, rapid maneuver | Best for piercing enemy lines; high supply cost. |
| Artillery | Softening targets, fortification reduction | Use before an offensive to degrade enemy defenses. |
| Air Recon | Scouting, marking targets | Use to reveal enemy positions and supply hubs. |
| Close Air Support | Direct combat support | Use to assist tank spearheads and morale destruction. |
When you command Battleplan units, you must leverage their unique strengths. For example, infantry are excellent for the "Seize Ground" order, which allows them to take over territory and hold it. However, they are slow. To maximize their potential, you should use your tank divisions to create a breakthrough, then have your infantry follow behind to "mop up" the remaining pockets of resistance.
The Art of Planning: Readiness and Zone Orders
The game introduces a unique "Readiness" system that fundamentally changes how you approach combat. When playing with Readiness mode enabled, you cannot execute orders instantly. You must wait for the plan to reach 100% readiness. This system forces you to think ahead. While you are executing one plan, you should already be drawing the next one.
The "Zone Orders" system is a massive quality-of-life improvement that allows you to designate areas of operation. By using the Regimental plan order, you can draw directly on the map to define where your troops should operate. This automation, when combined with manual planning, creates a fluid, high-level command experience.
Planning Workflow for Success:
- Phase 1 (Preparation): Use artillery barrages to soften up the target area.
- Phase 2 (Initiation): Execute a "Seize Ground" order with infantry to pin the enemy.
- Phase 3 (Breakthrough): Launch your armored spearhead once the enemy morale has dropped.
- Phase 4 (Follow-up): As the tanks advance, immediately draw the next set of orders for infantry to secure the rear.
According to community reports, the ability to pause and adjust these plans is vital. Do not be afraid to use the game's time-control features. Pausing allows you to assess the situation, check the morale of your units, and ensure your supply lines are not stretched too thin.
Advanced Combat Tactics: Scouting and Morale
Combat is not just about raw power; it is about psychological warfare and information dominance. Scouting is one of the most underutilized mechanics by new players. When your air recon or infantry scouts uncover an enemy unit, that unit becomes "marked."
A marked unit suffers from reduced morale and defensive capabilities. By keeping your scouts active, you can significantly increase the damage your artillery deals and lower the effectiveness of enemy resistance. If you see a unit waving a white flag, it means their morale has hit rock bottom—this is your signal to push hard and force a surrender or retreat.
Combat Status Checklist
- Fortification Level: Check this percentage. If it is high, do not attack directly. Use artillery to reduce it first.
- Morale: Marked units (with the binoculars icon) are vulnerable. Focus your attacks on them to cause a rout.
- Supply Status: If your units are flashing yellow, they are critically low on supplies. They will perform poorly in combat.
- Night Cycle: Remember that progress slows significantly at night. Use this time to reorganize, rebase, and plan your next day's orders.
Managing the Chaos of Battle
One of the most important takeaways from the game’s design is that you are a commander, not a micro-manager. You set the high-level goals—the "Battleplan"—and your officers and companies carry them out. If you try to control every single movement, you will likely become overwhelmed.
Instead, focus on the "big picture." If you see a breakthrough in the enemy line, don't worry about the specific infantry pathing; ensure they have a "Seize Ground" order that covers the newly captured territory. If your armored units are moving too fast for your supply lines to keep up, pause the game, relocate your supply points, and adjust the pace of your advance.
The game is designed to be a simulation of month-long campaigns. You will have days where very little happens, and days where the entire front collapses in hours. Patience is a virtue. As you gain more experience, you will learn to spot the patterns in the AI's behavior and anticipate where they will attempt to counterattack.
FAQ: Frequently Asked Questions
Q: How do I stop my units from running out of supplies? A: You must actively manage your supply points. As your army pushes forward, you need to deconstruct rear-line supply points and reconstruct them closer to the front. Always keep an eye on your units' supply status; if they start flashing yellow, halt the offensive until they are resupplied.
Q: Is it better to use the "Planning Phase" or "Readiness" mode? A: Readiness mode is generally considered more forgiving for new players because it allows for more flexibility in creating plans during the day. The "Planning Phase" mode is more rigid, restricting you to one planning phase per day, which provides a significantly higher challenge.
Q: Why are my Battleplan units not following my orders? A: Check if your orders have reached 100% readiness. If they haven't, your units will not execute the orders. Additionally, ensure your units are not out of supplies or suffering from extremely low morale, as these factors can severely degrade their combat effectiveness and ability to follow commands.
Q: Can I customize my units in every mission? A: Yes, the Army Builder allows for deep customization. However, if you want to get into the action quickly, you can use the "Use Historical units" preset, which automatically configures your army for the mission at hand.
Related guides
Mastering Battleplan Combined Arms: The Ultimate Strategy Guide for Army Dominance
Learn how to dominate the battlefield in Battleplan by mastering combined arms tactics, unit synergies, and effective army composition strategies.
Mastering Battleplan Division Management for Ultimate Tactical Victory
Learn essential battleplan division management strategies, supply logistics, and tactical order planning to dominate WWII RTS warfare.
Mastering Battleplan Officer Skills: Strategies for Ultimate RTS Victory
Learn how to optimize Battleplan officer skills, command corps efficiently, and master supply lines to win complex World War II real-time strategy battles.
Mastering the Battleplan Army Builder: Ultimate Strategy & Customization Guide
Discover how to optimize your forces using the Battleplan army builder. Learn advanced WWII RTS tactics, supply management, and roster customization.